sy2207
Donating Member
Having my truck torn down for the last few years doesn't make me too active of a member on this board. I get to read about all your antics with these trucks but I hardly get to contribute. I have completed at least 2000 hours of body work making my truck razor straight and adding slight custom modifications. This writeup is just one part of this endeavor but it is probably one of the more interesting changes. Talking about straightening a bed doesn't make the best reading experience.
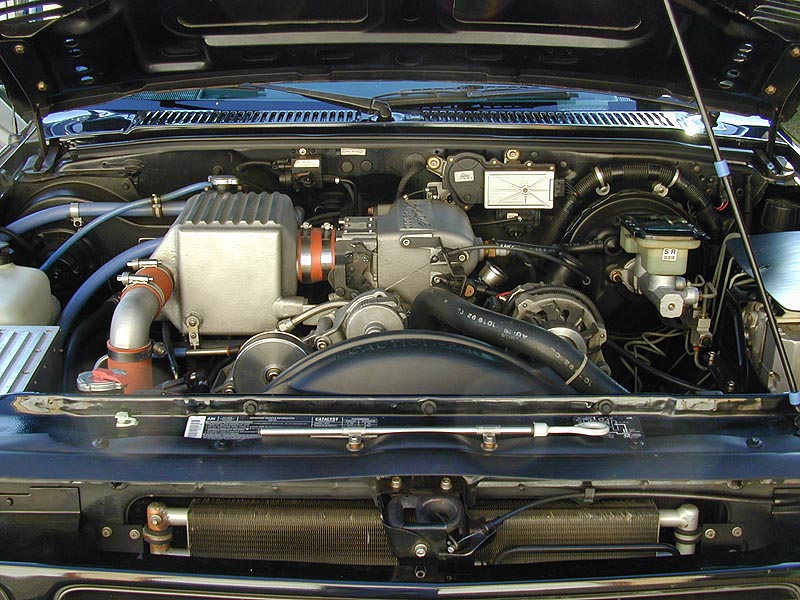
I started out wanting to clean up my firewall and get rid of the wiper motor as well as relocate the fuse block and relays. I could have deleted it all together and made the job a cake walk but I wanted to be different and still have the functionality of the wipers. Damn, let me tell you it wasn't easy. I had to reengineer EVERY component. There lots of hurdles along the way, many of which I'm sure I have forgotten about. I didn't take pictures of every step, which I kind of regret, but I think I can explain most of it. MS Paint helped too. I did this project during spring break last year so the details are kind of sketchy.
The first step was to pull off the wiper motor. I tried to fit it into the open area in the cowl but it was just a little too big. I probably could have gone to the junkyard and found a smaller motor but I was doing this on a budget. I didn't want to hack the cowl apart to wedge it in either so I improvised. I knew I could get rid of the circuit board that was attached to the body and I wanted it out anyway because water was more easily going to get to it. I pulled it off and extended wires off of it. Everything was sealed up with silicone.

The motor would now fit into place but it was still too tall so I cut off the upper bracket. I knew the motor was going to have a ton of torque and two bolts wouldn't support it properly. What I did instead was to use one of the rivet holes on top of the housing to double as the upper support.

The next problem I ran into was that the wiper output shaft was a bit too long. I pre-fit it in place but the width of the motor body and the arm was too wide. I removed the shaft, chucked it into a lathe and cut a quarter inch off its overall length. I then retapped the threads and cut the wiper locating slots further down the shaft.

This was all bolted up and test fitted. This worked but it still wasn't narrow enough. I then narrowed the angle of the wiper arm. I didn't change the overall length so it didn't affect the wiper travel. I just reduced the angle.

Here is the actual arm:

Now came the part that took me a while to figure out. Not only is the motor flipped 180 degrees but it is also rotated a few degrees. If you look at the position of the motor in its stock location it is tilted a little bit. Where I am mounting the motor it is exactly horizontal.

The wiper motor has a switch and cam assembly inside of it that says when it is at the bottom of its stroke. Since I rotated the motor I now need to compensate for this by counterrotating this cam to sense its new bottom of travel. The gear that drives the output shaft also doubles as this cam. I don't have a picture of it but the cam is on the inside of the gear. I moved the ramp of the cam by filing away material and adding material. Since it is made out of nylon, nothing liked to stick to it. I used flexible plastic bumper filler to actually create the new cam lobe. I drilled holes and put a couple of small nails through the body of the cam to give it some support for the body filler I used. Here is a rough sketch to show how the cam was moved.

In retrospect, if I had to do it again, I would have cut the slot that positions the wiper arm at this different angle. I wouldn't of had to change the cam location but since I already filed the shortened output shaft I was stuck with what I had.
The next step was to securely mount the motor in the cowl. I built a couple lower brackets that attached to the factory wiper motor. I don't know the dimensions of the brackets but let me tell you that there is only one size that will fit in. Any higher and it will hit the top of the cowl. Any lower it will hit the bottom of the cowl. This goes with the the front to rear dimensions as well.


Motor installed. In the following pics you can just barely make out the right angle bracket that is attached to the top of the cowl. I isolated the vibrations with bushings on either end.


The actuating arm coming off the motor now crosses in front of of the passenger wiper assembly since this arm is now on the opposite side. I had to extend its length. Again I didn't add any length length to the passenger wiper arm just increased the length along the X axis.

Here you can see the extra length of the wiper assembly I sectioned in between. I also had to lengthen the arm from the motor to the driver wiper assembly you can see this here too.

As you can see clearances are tight

Here is a better pic of the upper mount. That arm off the motor is about 1/8 inch from the top and bottom of the cowl.


The wiring for the motor as well as the wiper fluid line was tucked up along the cowl's edge. It all ran down to the side of the cowl.

I started out wanting to clean up my firewall and get rid of the wiper motor as well as relocate the fuse block and relays. I could have deleted it all together and made the job a cake walk but I wanted to be different and still have the functionality of the wipers. Damn, let me tell you it wasn't easy. I had to reengineer EVERY component. There lots of hurdles along the way, many of which I'm sure I have forgotten about. I didn't take pictures of every step, which I kind of regret, but I think I can explain most of it. MS Paint helped too. I did this project during spring break last year so the details are kind of sketchy.
The first step was to pull off the wiper motor. I tried to fit it into the open area in the cowl but it was just a little too big. I probably could have gone to the junkyard and found a smaller motor but I was doing this on a budget. I didn't want to hack the cowl apart to wedge it in either so I improvised. I knew I could get rid of the circuit board that was attached to the body and I wanted it out anyway because water was more easily going to get to it. I pulled it off and extended wires off of it. Everything was sealed up with silicone.
The motor would now fit into place but it was still too tall so I cut off the upper bracket. I knew the motor was going to have a ton of torque and two bolts wouldn't support it properly. What I did instead was to use one of the rivet holes on top of the housing to double as the upper support.
The next problem I ran into was that the wiper output shaft was a bit too long. I pre-fit it in place but the width of the motor body and the arm was too wide. I removed the shaft, chucked it into a lathe and cut a quarter inch off its overall length. I then retapped the threads and cut the wiper locating slots further down the shaft.
This was all bolted up and test fitted. This worked but it still wasn't narrow enough. I then narrowed the angle of the wiper arm. I didn't change the overall length so it didn't affect the wiper travel. I just reduced the angle.
Here is the actual arm:
Now came the part that took me a while to figure out. Not only is the motor flipped 180 degrees but it is also rotated a few degrees. If you look at the position of the motor in its stock location it is tilted a little bit. Where I am mounting the motor it is exactly horizontal.
The wiper motor has a switch and cam assembly inside of it that says when it is at the bottom of its stroke. Since I rotated the motor I now need to compensate for this by counterrotating this cam to sense its new bottom of travel. The gear that drives the output shaft also doubles as this cam. I don't have a picture of it but the cam is on the inside of the gear. I moved the ramp of the cam by filing away material and adding material. Since it is made out of nylon, nothing liked to stick to it. I used flexible plastic bumper filler to actually create the new cam lobe. I drilled holes and put a couple of small nails through the body of the cam to give it some support for the body filler I used. Here is a rough sketch to show how the cam was moved.
In retrospect, if I had to do it again, I would have cut the slot that positions the wiper arm at this different angle. I wouldn't of had to change the cam location but since I already filed the shortened output shaft I was stuck with what I had.
The next step was to securely mount the motor in the cowl. I built a couple lower brackets that attached to the factory wiper motor. I don't know the dimensions of the brackets but let me tell you that there is only one size that will fit in. Any higher and it will hit the top of the cowl. Any lower it will hit the bottom of the cowl. This goes with the the front to rear dimensions as well.
Motor installed. In the following pics you can just barely make out the right angle bracket that is attached to the top of the cowl. I isolated the vibrations with bushings on either end.
The actuating arm coming off the motor now crosses in front of of the passenger wiper assembly since this arm is now on the opposite side. I had to extend its length. Again I didn't add any length length to the passenger wiper arm just increased the length along the X axis.
Here you can see the extra length of the wiper assembly I sectioned in between. I also had to lengthen the arm from the motor to the driver wiper assembly you can see this here too.
As you can see clearances are tight
Here is a better pic of the upper mount. That arm off the motor is about 1/8 inch from the top and bottom of the cowl.
The wiring for the motor as well as the wiper fluid line was tucked up along the cowl's edge. It all ran down to the side of the cowl.
Last edited: