

dutchty
Member
CLOSED for orders FOR THE LOWER CAC UPGRADE:cmas:
who likes to have an aftermarket upgrade / replacement for their stock lower IC radiator.
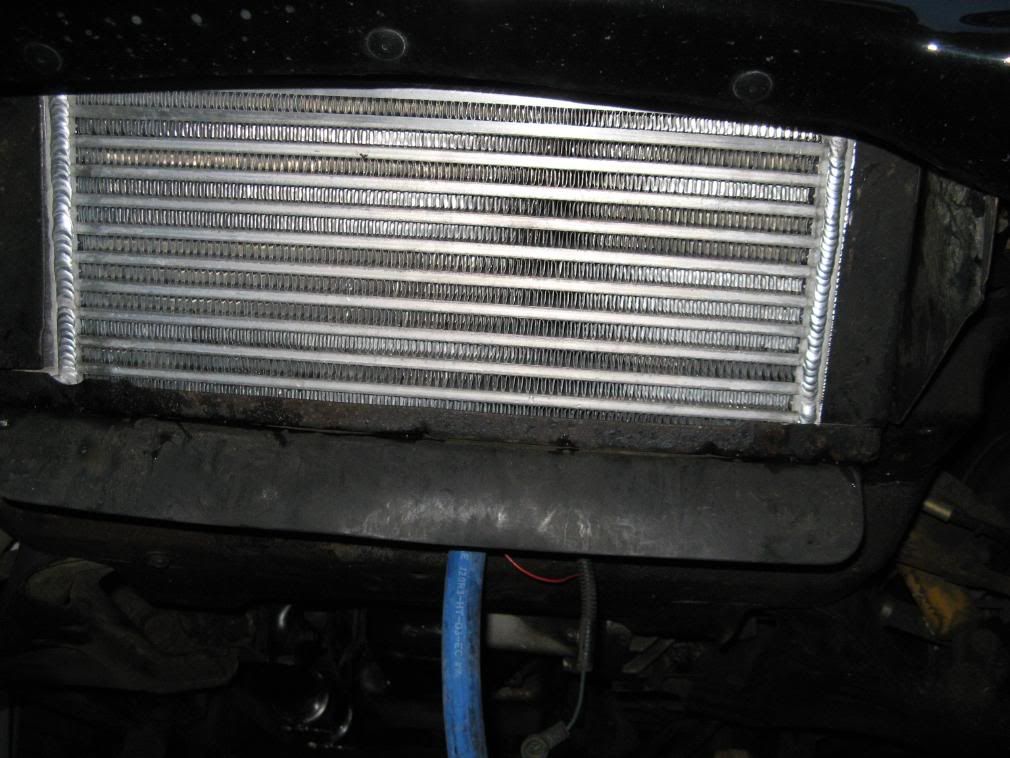
radiator core: 21 1/2" x 8"x 3" all aluminium bar and plate design, as pictured. I still can send a pdf file with "A how to install guideline with pics" to anyone by E-mail, let me know asap.

some specs and comments about its performance from others who already installed the UPGRADED LOWER CAC can be found here
http://www.syty.net/forums/showpost.php?p=786354&postcount=181
http://www.syty.net/forums/showpost.php?p=710694&postcount=4
What do you get: :drool:
: :colors:
==================================================================
Sean Lauver: PAID :tup:shipped
WoSyclone PAID :tup:shipped
43t_ftw PAID :tup:shipped
PCP_58 PAID :tup:shipped
Norwegian TY
Balder
Double A
Nello
THEMADTYPHOON
stl_ty
sy2585
ziembic
Seti
StuckinCincy
WideSyTy
SY2455
V
STEVECUL8ER
SY777
turboj91
shelbyeuropa
too many toys
INSTALLATION PICS:
A/W intercooler in stock lower bracket.
Altering the bracket and so on will take about 4 hours, when you are not prepped (well I did, just started without any knowledge),
so it is possible when you have al your tools ready to do this in about 1.5H.
what tools are needed:
medium screw driver for the hose clambs and IC pump.
philips screw driver for unscrewing the CAC frame parts.
Bucket for the coolant
wrenches to (un)bold the CAC frame
some sort of cutting tool, a grinder would be the best option.
drill for just 4 holes of 6mm
cutting plyer for just cutting the ty bands on the hoses
4 bolts M5x12mm and 4x M5 nuts (use loctite or locknuts)
NEW AND OLD
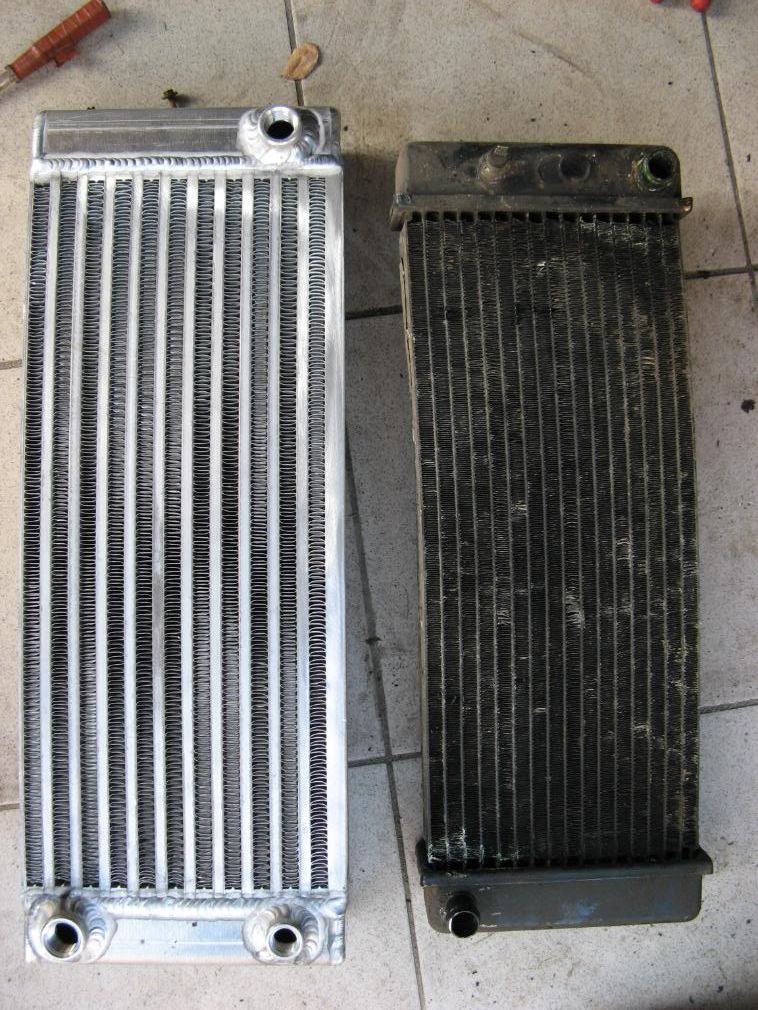
NEW AND OLD
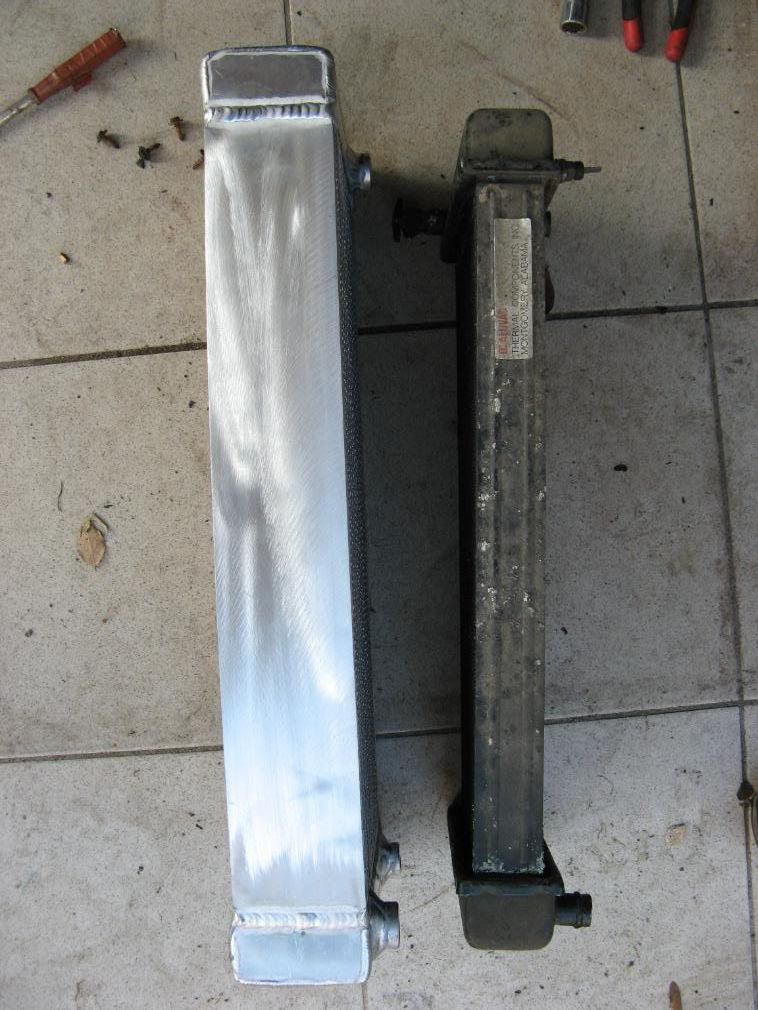
WHAT TO ALTER ON THE CAC BRACKET IS:
cut away the edge at the bottom of the CAC frame
drill 4 new fixing holes to bold the frames together again.
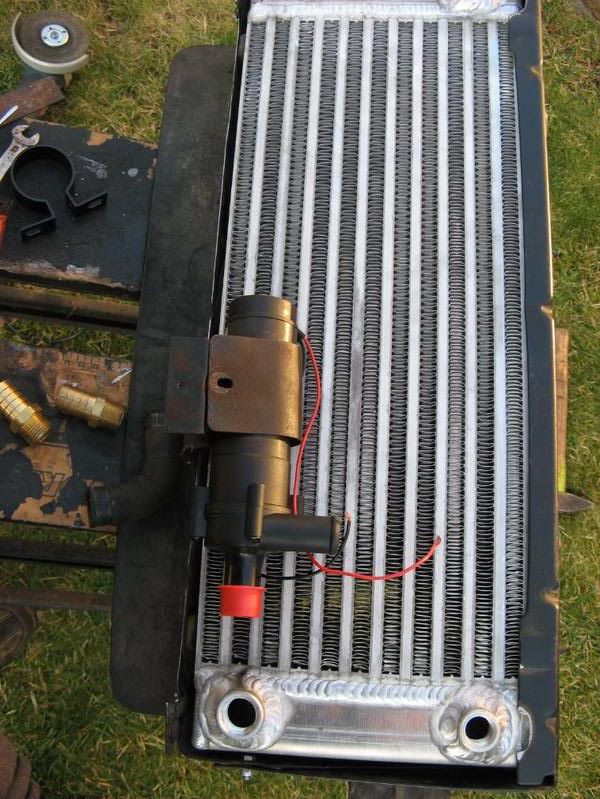
ALTERED CAC FRAME FINISHED
the flaps on the right and left cut away to fit in the new radiator so it doesn't obstruct the airflow.
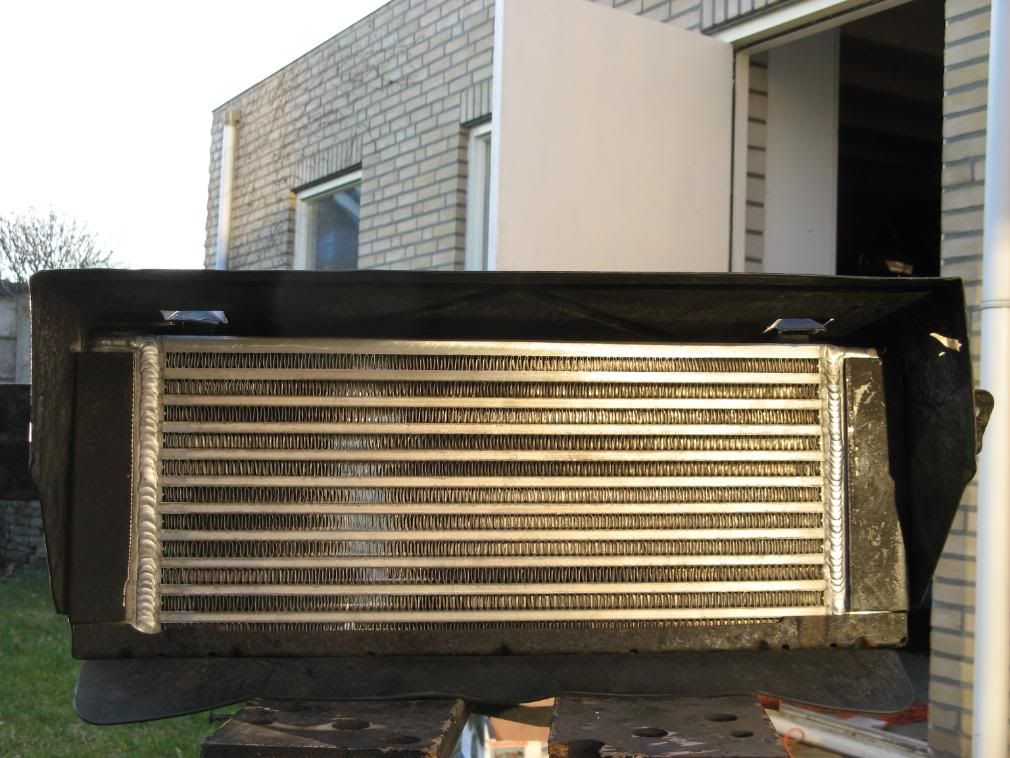
FIT FIRST BEFORE YOU GONNA REPAINT THE CAC FRAME
who likes to have an aftermarket upgrade / replacement for their stock lower IC radiator.
radiator core: 21 1/2" x 8"x 3" all aluminium bar and plate design, as pictured. I still can send a pdf file with "A how to install guideline with pics" to anyone by E-mail, let me know asap.
some specs and comments about its performance from others who already installed the UPGRADED LOWER CAC can be found here
http://www.syty.net/forums/showpost.php?p=786354&postcount=181
http://www.syty.net/forums/showpost.php?p=710694&postcount=4
What do you get: :drool:
- The radiator core: about 21 1/2" x 8"x 3" all aluminium bar and plate design, as pictured
- two 3/4" hose connections
- NOT AVAILABLE ANYMORE: 3/8" connection hole for aftermarket levelsensor (sensor not included ) because of, the OEM factory non functioning level indicator on the dash, the level sensor hole can be ignored and plugged. For the people who have made an functioning level indicator, they have to replace it with a 3/8"sensor for their purpose
[*]Drain (This tab is not in the pictures because I didn't had that option at that time)
[*]A how to install guidelines with pics, send to you by mail.
: :colors:
==================================================================
- skipztt
- jpalmer
- mark 0076
- Typhoonman
- Syclone Rob
- jollygreen1964
- tylex
- TDS racing
- SY-1193
Sean Lauver: PAID :tup:shipped
WoSyclone PAID :tup:shipped
43t_ftw PAID :tup:shipped
PCP_58 PAID :tup:shipped
Norwegian TY
Balder
Double A
Nello
THEMADTYPHOON
stl_ty
sy2585
ziembic
Seti
StuckinCincy
WideSyTy
SY2455
V
STEVECUL8ER
SY777
turboj91
shelbyeuropa
too many toys
INSTALLATION PICS:
A/W intercooler in stock lower bracket.
Altering the bracket and so on will take about 4 hours, when you are not prepped (well I did, just started without any knowledge),
so it is possible when you have al your tools ready to do this in about 1.5H.
what tools are needed:
medium screw driver for the hose clambs and IC pump.
philips screw driver for unscrewing the CAC frame parts.
Bucket for the coolant
wrenches to (un)bold the CAC frame
some sort of cutting tool, a grinder would be the best option.
drill for just 4 holes of 6mm
cutting plyer for just cutting the ty bands on the hoses
4 bolts M5x12mm and 4x M5 nuts (use loctite or locknuts)
NEW AND OLD
NEW AND OLD
WHAT TO ALTER ON THE CAC BRACKET IS:
cut away the edge at the bottom of the CAC frame
drill 4 new fixing holes to bold the frames together again.
ALTERED CAC FRAME FINISHED
the flaps on the right and left cut away to fit in the new radiator so it doesn't obstruct the airflow.
FIT FIRST BEFORE YOU GONNA REPAINT THE CAC FRAME
Last edited:


